( Editor)
- Select the [Printer and ] Tab.
- Click [Change Profiles...] button.
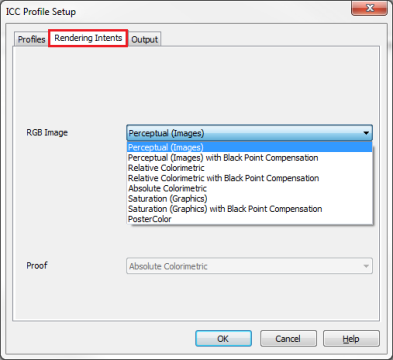
- Select the[Rendering Intents] tab (Figure 1).
- For each drop-down list, select the you want to use.
NOTE: Depending on the type of data in your image, some options may not be available.
If you are working witha PostScript / PDF file or a , you can choose a [Rendering Intent] for both image and vector data and Lab Images. The [Proof] option is disabled unless a Proof is selected on the [Profiles] tab. Proofing allows you to simulate the Rendering Intent as if you were printing on another printer.
(RIP-Queue)
-
1. Highlight a printer and click “Configure Printer” icon on the toolbar. This opens “Configure Printer” dialog.
-
2. In the [Quick Sets] tab, click [Edit] button. This opens “Edit Quick Set” dialog.
- Click the [ Change Profiles...] button. This opens the " Setup" dialog.
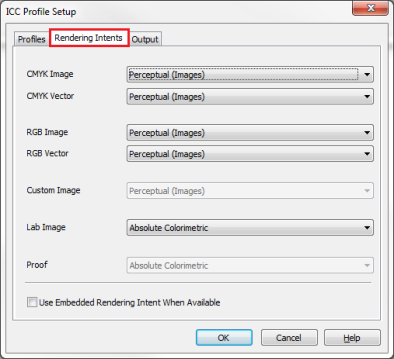
- Click the [Rendering Intents] tab (Figure 2).
- For each drop-down list, select the Rendering Intent you want to use.
NOTE: Depending on the type of your image data, some options may not be available.
The options on the [Rendering Intents] tab of the "ICC Profile Setup" dialog allow you to select the rendering intent you want to use. If you are working with a PDF file or a Quick Set, you may choose a rendering intent for [Image], [] data and [Lab Images]. The [Consistency Simulation/Proofing] option is disabled unless a Consistency Simulation/Proofing ICC is selected on the Profiles tab. The rendering intent for Consistency Simulation/Proofing allows you to choose how accurately to render the gamut of the target printer when proofing. The default for proofing is Absolute as it makes adjustments to preserve the media color. For Consistency Simulation it is recommended that Relative with Compensation be used to avoid clipping of shadows and compensate for differences in media white point. For more information, see Proofing.
 To use the [Rendering Intents] tab:

